Setting Up and Optimizing Your Thunderbolt 3 Dock with a Dell XPS 13 for Enhanced Connectivity
Understanding the Basics of Thunderbolt 3 Technology
Before we dive into the setup and optimization of your Thunderbolt 3 dock, it’s essential to understand the basics of this powerful technology. Thunderbolt 3 is a hardware interface developed by Intel that uses the USB-C connector to provide a multifaceted connection for data transfer, display output, and power delivery. It supports up to 40 Gbps of bandwidth, which is double that of Thunderbolt 2, and can drive two 4K displays at 60 Hz or a single 5K display at 60 Hz[4].
Choosing the Right Thunderbolt 3 Dock for Your Dell XPS 13
When selecting a Thunderbolt 3 dock for your Dell XPS 13, compatibility and power delivery are crucial factors to consider.
This might interest you : Essential Tips for Establishing a Secure Remote Desktop Connection on Your Lenovo ThinkCentre M90n
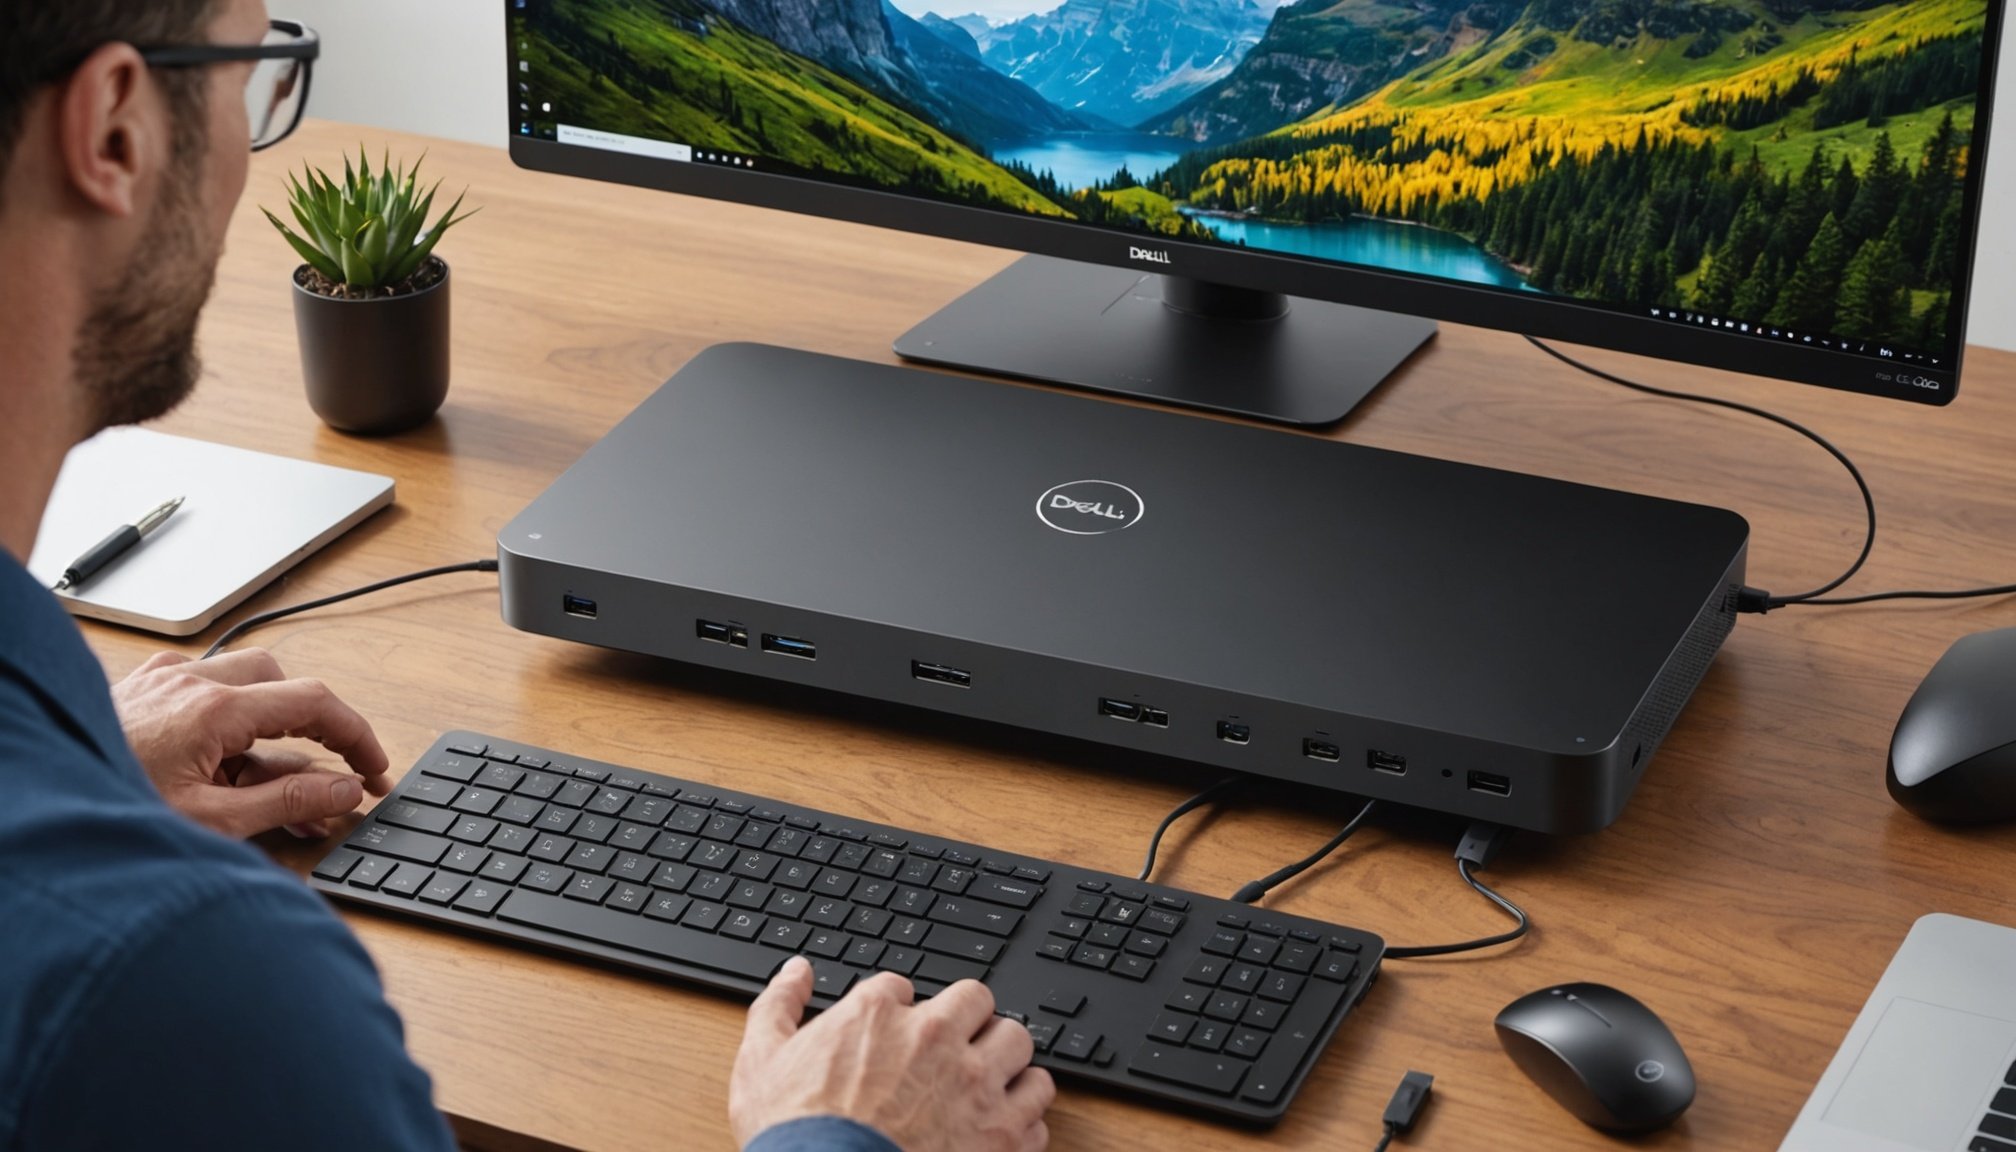
Dell Thunderbolt Dock WD19TBS
The Dell Thunderbolt Dock WD19TBS is a highly recommended option for Dell laptops, including the XPS 13. It offers 130W of power delivery, which is sufficient for most Dell laptops, and supports up to three displays, including a single 5K and dual 4K monitors. This dock also features a range of ports, including USB Type-A, USB Type-C, HDMI, DisplayPort, and Ethernet, making it a versatile choice for connecting various peripherals[5].
Dell Performance Dock WD19DC/WD19DCS
For laptops that require higher power delivery, the Dell Performance Dock WD19DC/WD19DCS is an excellent option. It provides up to 210W of power through a dual USB-C connector, ensuring that your laptop stays charged without the need for an additional power adapter. This dock is particularly useful for high-performance laptops that demand more power[1].
In the same genre : Step-by-Step Guide to Setting Up a VoIP System with Cisco SPA112 and Synology NAS
Step-by-Step Setup Guide
Unboxing and Physical Setup
- Unbox Your Dock: Carefully unbox your Thunderbolt 3 dock and ensure all components, including the power adapter and cables, are included.
- Connect the Power Adapter: Plug the power adapter into the dock and then into a wall outlet.
- Connect the Thunderbolt 3 Cable: Use the provided Thunderbolt 3 cable to connect your Dell XPS 13 to the dock. Ensure the cable is securely plugged into both the laptop and the dock.
Software and Driver Installation
- Install Drivers: If your dock requires specific drivers, download and install them from the manufacturer’s website. For Dell docks, you can find the necessary drivers on the Dell support page.
- Update Firmware: Regularly update the dock’s firmware to ensure you have the latest features and bug fixes. This can usually be done through the manufacturer’s software or tools like Dell Client Command Suite[5].
Configuring Your Dock for Optimal Performance
Display Configuration
- Connecting Displays: You can connect up to two 4K displays at 60 Hz or a single 5K display at 60 Hz using the DisplayPort and HDMI ports on your dock. For example, you can connect one display via DisplayPort and another via HDMI.
- DisplayPort: Supports up to 4K at 60 Hz or 5K at 60 Hz.
- HDMI: Supports up to 4K at 60 Hz.
| Display Type | DisplayPort | HDMI |
|
|-------------|
|
| 4K @ 60Hz | Yes | Yes |
| 5K @ 60Hz | Yes | No |
Audio and USB Configuration
- Audio Connections: Use the audio ports on your dock to connect speakers or headphones. Most Thunderbolt 3 docks include 3.5mm audio jacks.
- USB Connections: Connect your USB devices such as keyboards, mice, and external hard drives to the USB Type-A and Type-C ports on the dock. Ensure that you are using the correct type of USB cable to avoid any connectivity issues.
Ethernet and Network Configuration
- Ethernet Connection: Connect an Ethernet cable to the dock’s Ethernet port for a stable and fast internet connection.
- Network Settings: Ensure your network settings are configured correctly. You may need to set your Ethernet connection as the default network adapter in your laptop’s network settings.
Troubleshooting Common Issues
Dock Not Recognized by the System
- Group Policy Settings: One common issue is that the dock is not recognized due to Group Policy settings in Windows. These settings might prevent USB-C and Thunderbolt devices from being installed. Check your Windows image for such policies and adjust them accordingly[2].
- Driver Issues: Ensure that the necessary drivers are installed and updated. Sometimes, reinstalling the drivers can resolve recognition issues.
Power Delivery Issues
- Insufficient Power: If your laptop is not charging properly, ensure that the dock is capable of delivering enough power. For example, the Dell XPS 13 might require up to 130W, so using a dock like the WD19TBS or WD19DC/WD19DCS is essential[1][5].
Optimizing Your Workspace with the Dock
Cable Management
- Organize Cables: Use cable ties and the dock’s built-in cable management features to keep your workspace clutter-free. This helps in maintaining a clean and organized setup.
- Mounting Options: Consider mounting your dock behind your monitor or under your desk using VESA mounts to save space and reduce clutter[5].
Performance and Productivity
- Multiple Displays: Utilize the multi-display support to enhance your productivity. Having multiple screens can help you multitask more efficiently.
- High-Speed Data Transfer: Use the Thunderbolt 3 ports for high-speed data transfer between devices, which is particularly useful for professionals who work with large files.
Practical Insights and Actionable Advice
Selecting the Right Peripherals
- USB Devices: Choose USB devices that are compatible with your dock. Ensure that the devices you connect are within the power delivery capabilities of the dock.
- Display Selection: Select displays that match the capabilities of your dock. For instance, if your dock supports up to 4K at 60 Hz, choose displays that can handle this resolution.
Regular Maintenance
- Firmware Updates: Regularly update the firmware of your dock to ensure you have the latest features and security patches.
- Driver Updates: Keep your drivers updated to avoid compatibility issues and ensure optimal performance.
Setting up and optimizing a Thunderbolt 3 dock with your Dell XPS 13 can significantly enhance your connectivity and productivity. By choosing the right dock, following the step-by-step setup guide, and troubleshooting common issues, you can ensure a seamless and efficient working experience.
Key Takeaways
- Compatibility: Ensure the dock is compatible with your Dell XPS 13 and meets your power delivery needs.
- Configuration: Properly configure your displays, audio, and USB connections for optimal performance.
- Troubleshooting: Be aware of common issues such as Group Policy settings and driver problems, and know how to resolve them.
- Optimization: Use cable management options and take advantage of multi-display support to enhance your workspace and productivity.
By following these guidelines, you can unlock the full potential of your Thunderbolt 3 dock and transform your workspace into a highly efficient and productive environment.